
The installation of 4 way switches requires strategic work because it enables the management of one or multiple lights from three and more switch points. The correct wiring process for rooms, hallways and staircases ensures both safety and operational functionality of electrical systems.
This guide contains the necessary details about 4-way switch wiring while explaining necessary components, step by step installation, wiring diagrams, safety precautions and troubleshooting approach etc.
What is a 4 Way Switch?
First to all we understand what is 4 way switch wiring. The 4 way switch serves as a unique electrical control device which enables users to operate one light fixture from different locations through the combination of two 3 way switches. 4 way switches differ from regular switches because they do not support on-off switching yet they connect electrical current between different traveler wires.
Main Key Features of a Switch 4 Way Wiring:
- This device integrates between two three-way switches.
- This device operates with four terminals because it has two input terminals and two output terminals compared to a standard 3-way switch.
- Depending on switch positions this device enables the electrical pathway to adapt which provides control over lights from various points.
Where is a 4 Way Switch Used mostly?
A system with multiple operating points is needed in large hallways because users need to activate lighting from multiple locations. Stairs require lights that can be controlled from various floors. Switch access is needed in living rooms because of their multiple entrance points. Garages and outdoor spaces for easy control from multiple areas.
Components Required for 4 Way Switch Wiring.
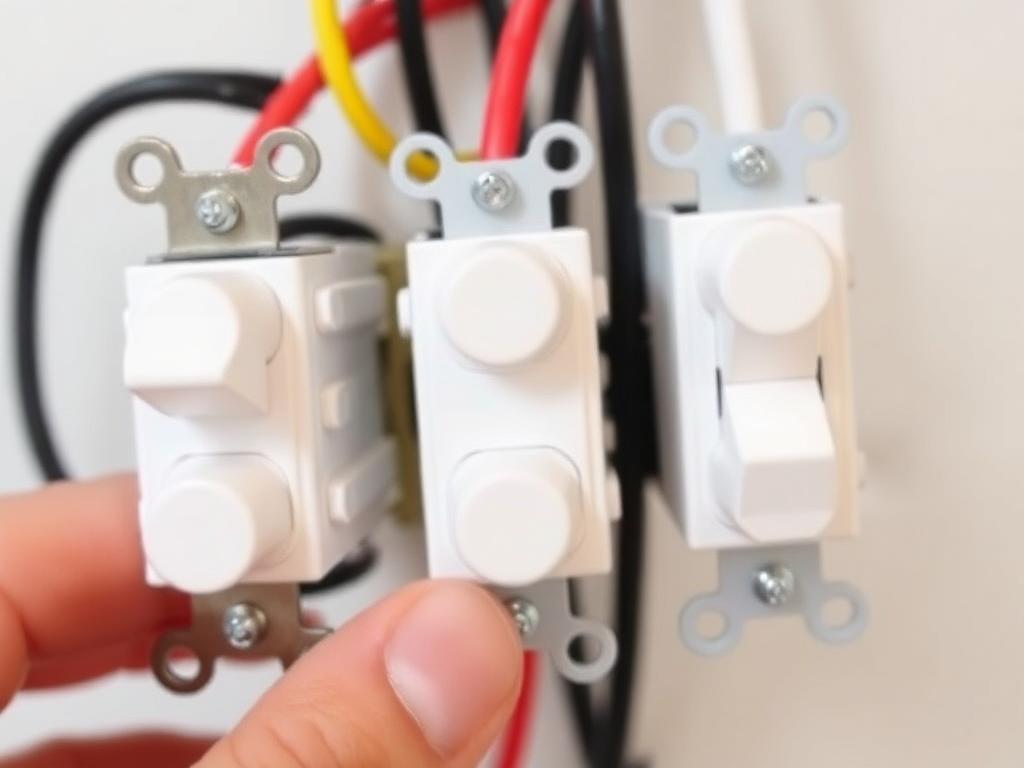 Must Check that you possess these materials before starting the project:
The circuit demands two 3 way switches which must be installed as the first and last components. A four-way switch can be used to operate control points. The number of 4 way switches depends on your control-point requirements. The connected area consists of 1 or more light fixtures which the control system will manage. The wiring setup contains electrical cable that consists of fourteen/3 or twelve/3 gauge wires with one hot wire, one neutral wire, one ground wire as well as two traveler wires. Wire nuts function as wire connectors to join wire junctions. The voltage tester serves the essential purpose of verifying power absences in wires. Screwdriver and wire stripper for installation and wire preparation. The installation process requires electrical tape as a protective layer that also maintains wire connections.
Understanding 4 Way Switch Wiring Diagram.
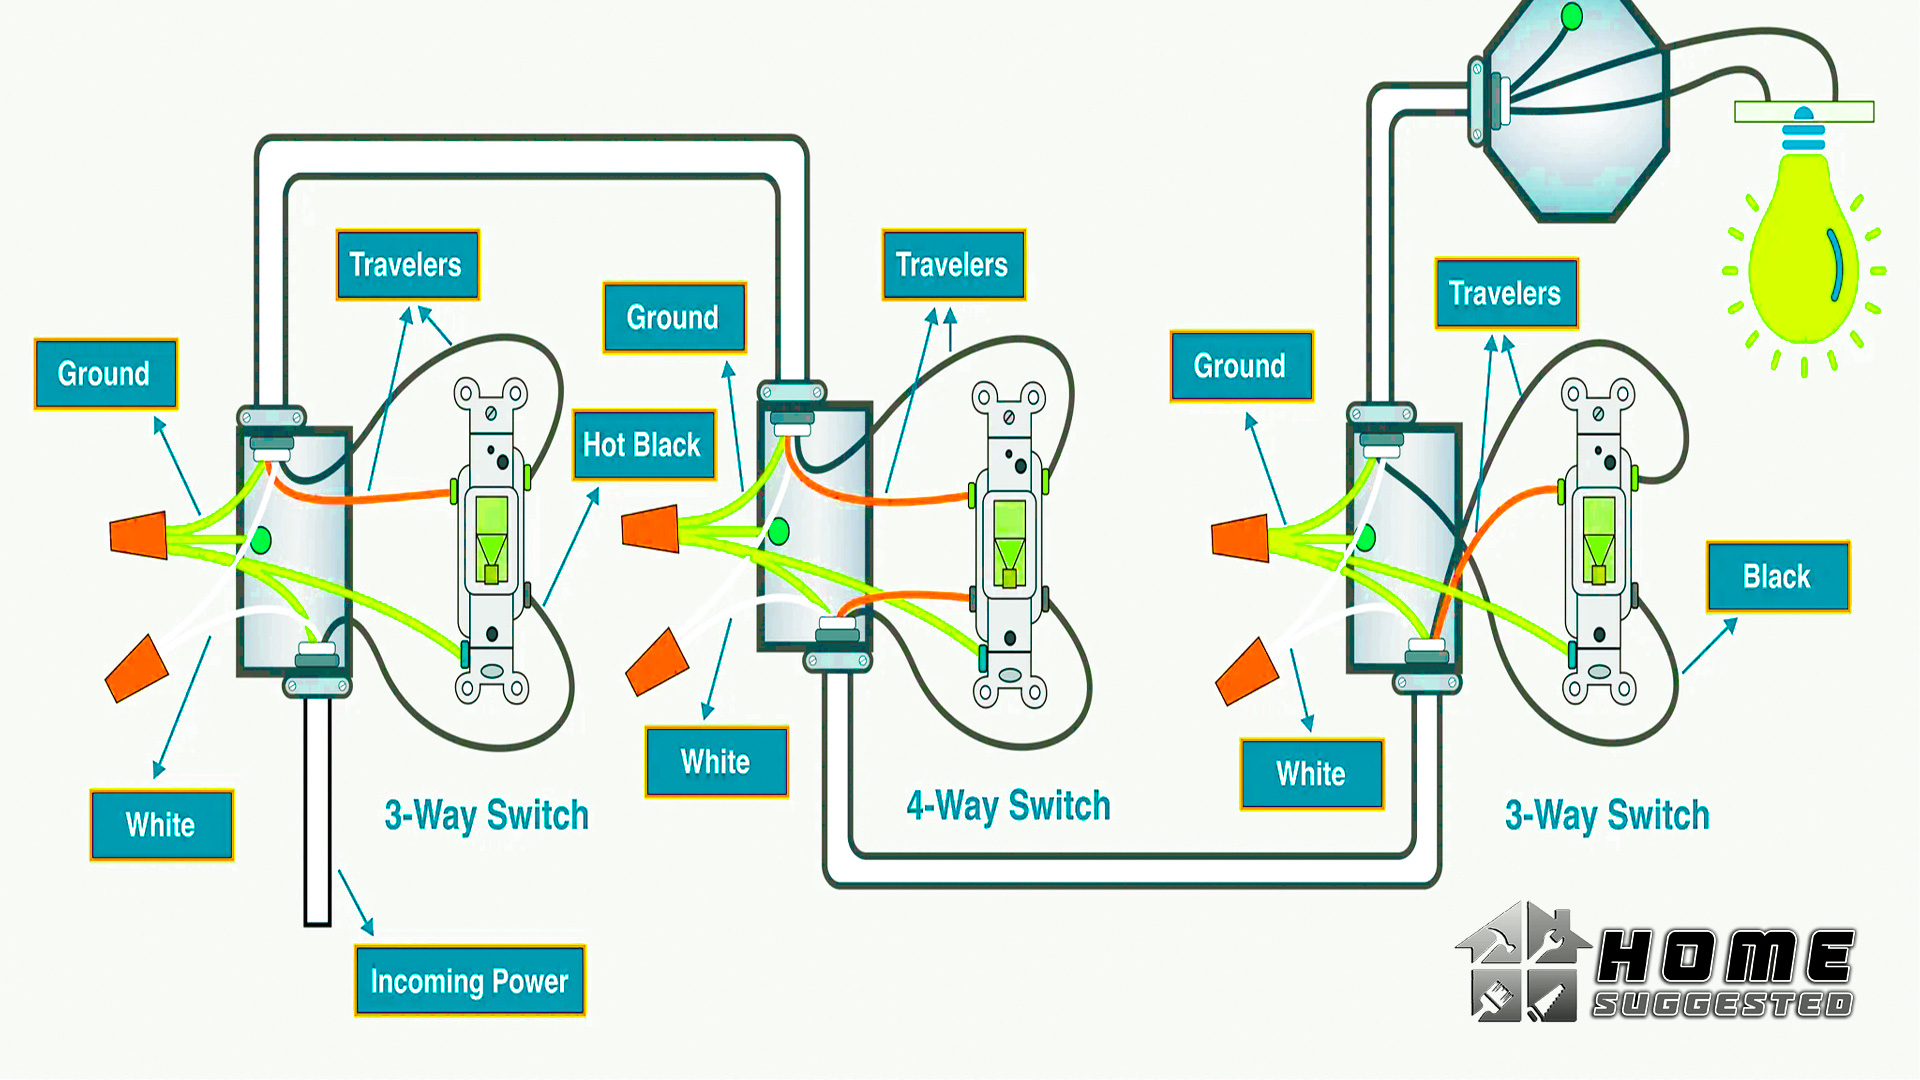
Four way switching functions according to this method:
- The first 3 way switch obtains its power from the hot wire which connects to its common terminal.
- The connection between the first 3 way switch and the 4 way switch should include two traveler wires.
- From the 4 way switch to the second 3 way switch another duet of traveler wires extends its path.
- The light fixture receives electrical power from the common terminal of the second 3 way switch.
The wiring structure lets electricity flow alter based on the position of switches which enables straightforward multiple location command functions.
How to install step by step Guide.
Step 1: Turn Off Power
Begin any wiring operation by Must turning off power supply at the breaker for Safety. A voltage tester should be used for checking that electricity does not flow.
Step 2: Install the First 3 Way Switch
- Link the power source hot wire to the common terminal located on the first 3 way switch.
- Attach one cable of the traveler wires to each traveler terminal of the circuit.
- The ground wire must be fastened to the green screw.
Step 3: Install the 4 Way Switch
- The two traveler wires from the first 3 way switch need to link to the input terminals of the 4 way switch.
- The output terminals of the second 3 way switch need to receive another pair of traveler wires.
- Secure the ground wire properly.
Step 4: Install the Second 3 Way Switch
- Mount two traveler wires at the traveler terminals coming from the 4 way switch.
- The common terminal requires connection to the light fixture.
- Attach the ground wire.
Step 5: Connect the Light Fixture
- The light fixture needs the neutral wire of the power source connected for operation.
- Secure the hot wire from the second 3 way switch at the fixture terminal.
- Secure the ground wire.
Step 6: Test the Wiring
- Next check the switch functionality during power-on operation.
- Verify proper operation of the light by testing its switch activation from every area.
Common Wiring Mistakes and Troubleshooting Problem.
Light Doesn’t Turn On.
Examine the power connection to ensure it is secure. Verify a proper connection of traveler wires. Check if all switches available work properly.
Light Works from Some Switches but Not Others.
Check traveler wire connections at the 4-way switch. Identify if terminals are properly positioned on the devices.
Flickering or Intermittent Operation.
Look for loose wire connections. Check for both faulty switches and damaged electrical wires in the system.
Safety Tips for Wiring a 4 Way Switch.
- You must switch off the circuit breaker when performing work on wiring.
- Verify the wire safety with a voltage tester prior to handling wires.
- Local electricity codes together with regulations must be followed during electrical work.
- Professional consultation is always required when electric tasks exceed understanding capabilities.
Frequently Asked Questions (FAQs).
Q1: Can I use multiple 4 way switches in a circuit?
Multi analog switches can function between two 3 way switches to enable extra control locations.
Q2: What happens if I miswire a 4 way switch?
Incorrect wiring between the switch may result in malfunction leading to either impaired functionality or the inability to control light operation.
Q3: Do I need a neutral wire for a 4 way switch?
The 4 way switch remains standalone because the neutral wire requires connection to the light fixture.
Q4: Can I replace a 4 way switch with a smart switch?
A smart switch works for your needs provided it has the capability to control 3 way and 4 way circuits.
Q5: Is it safe to do 4 way switch wiring myself?
People who have electrical work experience should consider performing the installation themselves. You should get professional help from a licensed electrician if you lack confidence about the task.
Final Instructions
Pursuing 4 way switch installation through proper planning and sequential action will lead to successful and distributed lighting control between multiple locations. Safety takes precedence throughout the process while you need to check both connections and test the wiring before finishing the installation. Please distribute this guide to people who require assistance with 4 way switch wiring setups.